Oftentimes in conversations with other kimono enthusiasts about stain removals, the first thing I describe doing other than possibly licking a stain like a goddamn psychopath is popping open a seam to get an absorbant material between the layers. What I have neglected to do thus far, however, is actually describe my procedure for doing exactly that.
Sewing is a major part of kimono restoration, and this tutorial won’t teach you how to sew a whole piece. But it will teach you how to open a seam and then securely and seamlessly (ba-dum-tiss) close it again. This can also be helpful to close a seam on a piece you bought where the thread has failed or otherwise needs repair. And even though it can be intimidating, I promise that it’s actually very simple.
Let’s begin!
I’m currently working on stain removals on this lovely antique:

It’s mostly some kind of sauce. I think ponzu. Yes I licked it. No you’re not surprised.
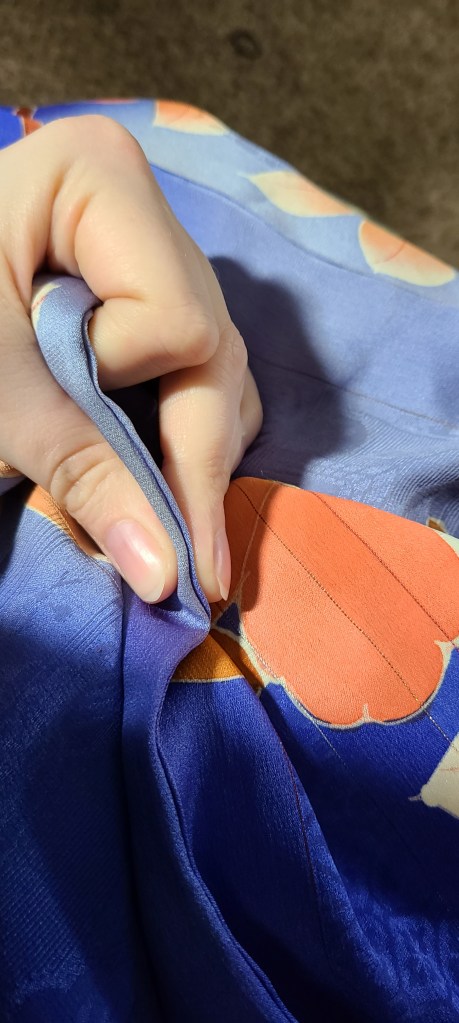
First we choose the spot that needs to be opened.

When I’ve selected my spot, I take it into my hand like so:
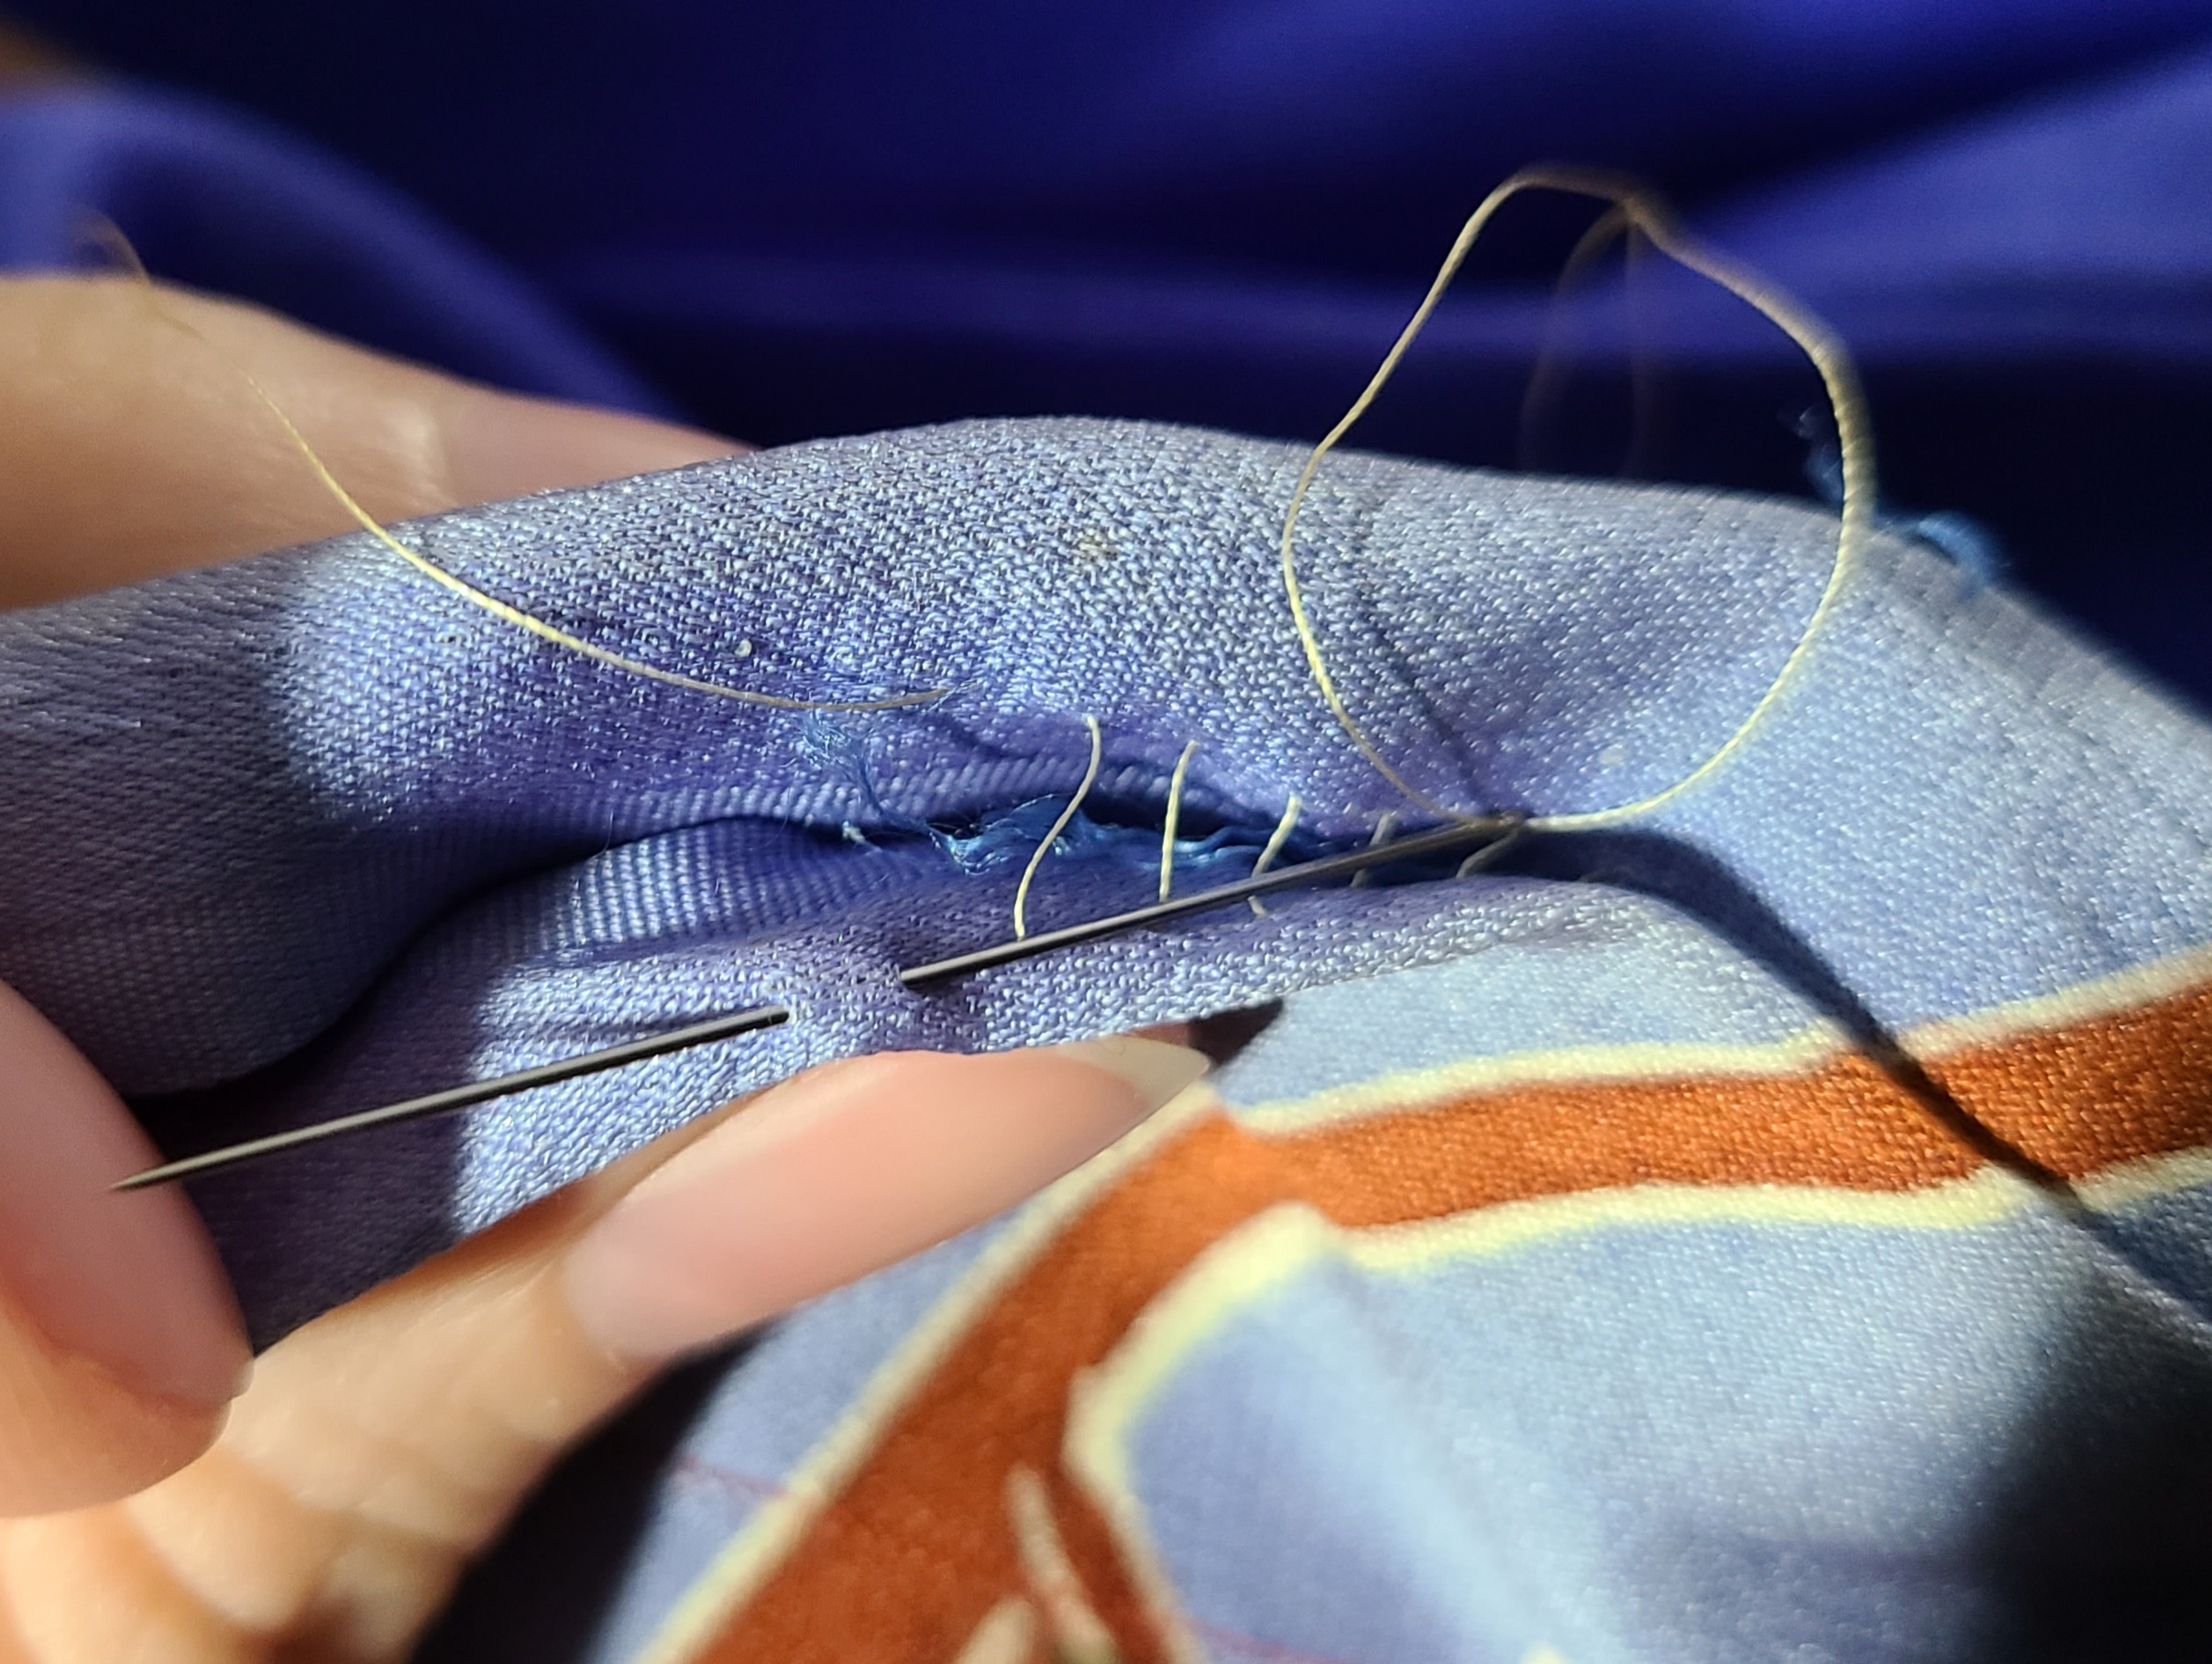
Then, I take the back of a thicker needle and dip it between the layers to grab hold of the thread and pull it forward like so:

We are going to sever that thread. I use an exacto knife to do it. Then, I pull the stitches out using the back of the needle until I have a hole big enough to work with.
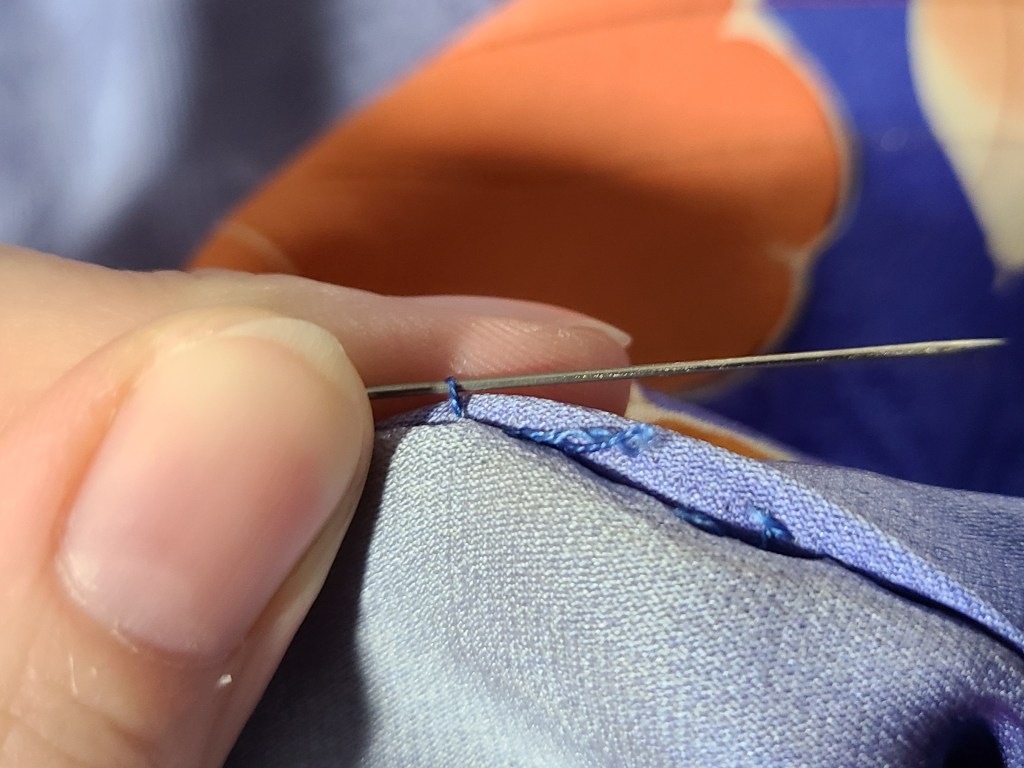
Here I am trying to illustrate that. Poorly.
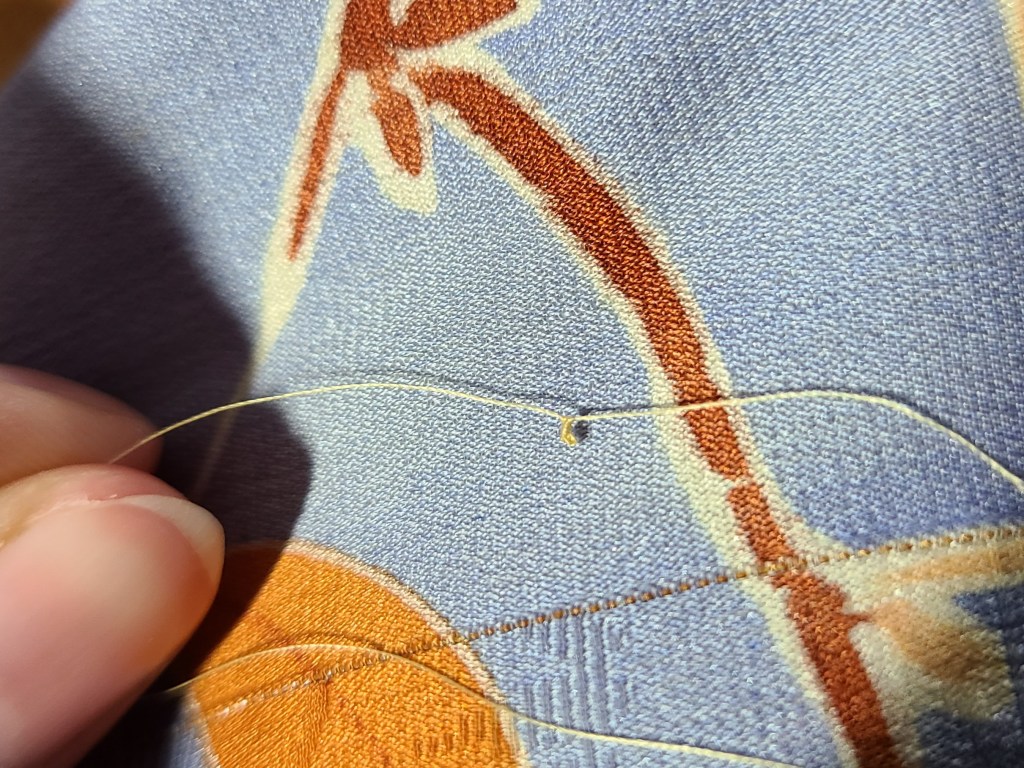
When the hole is as big as I need it to be, I like to inspect the fabric and old stitch holes for any problems. Also, you’ll notice a white thread in there. I very rarely have to cut that thread, but if you need to, make sure you tie it up.

For visibility, I’m using a yellow thread.
Tie a nice thick ass knot in the thread. Be patient and make it big. Because sometimes small knots can slip right through the silk.
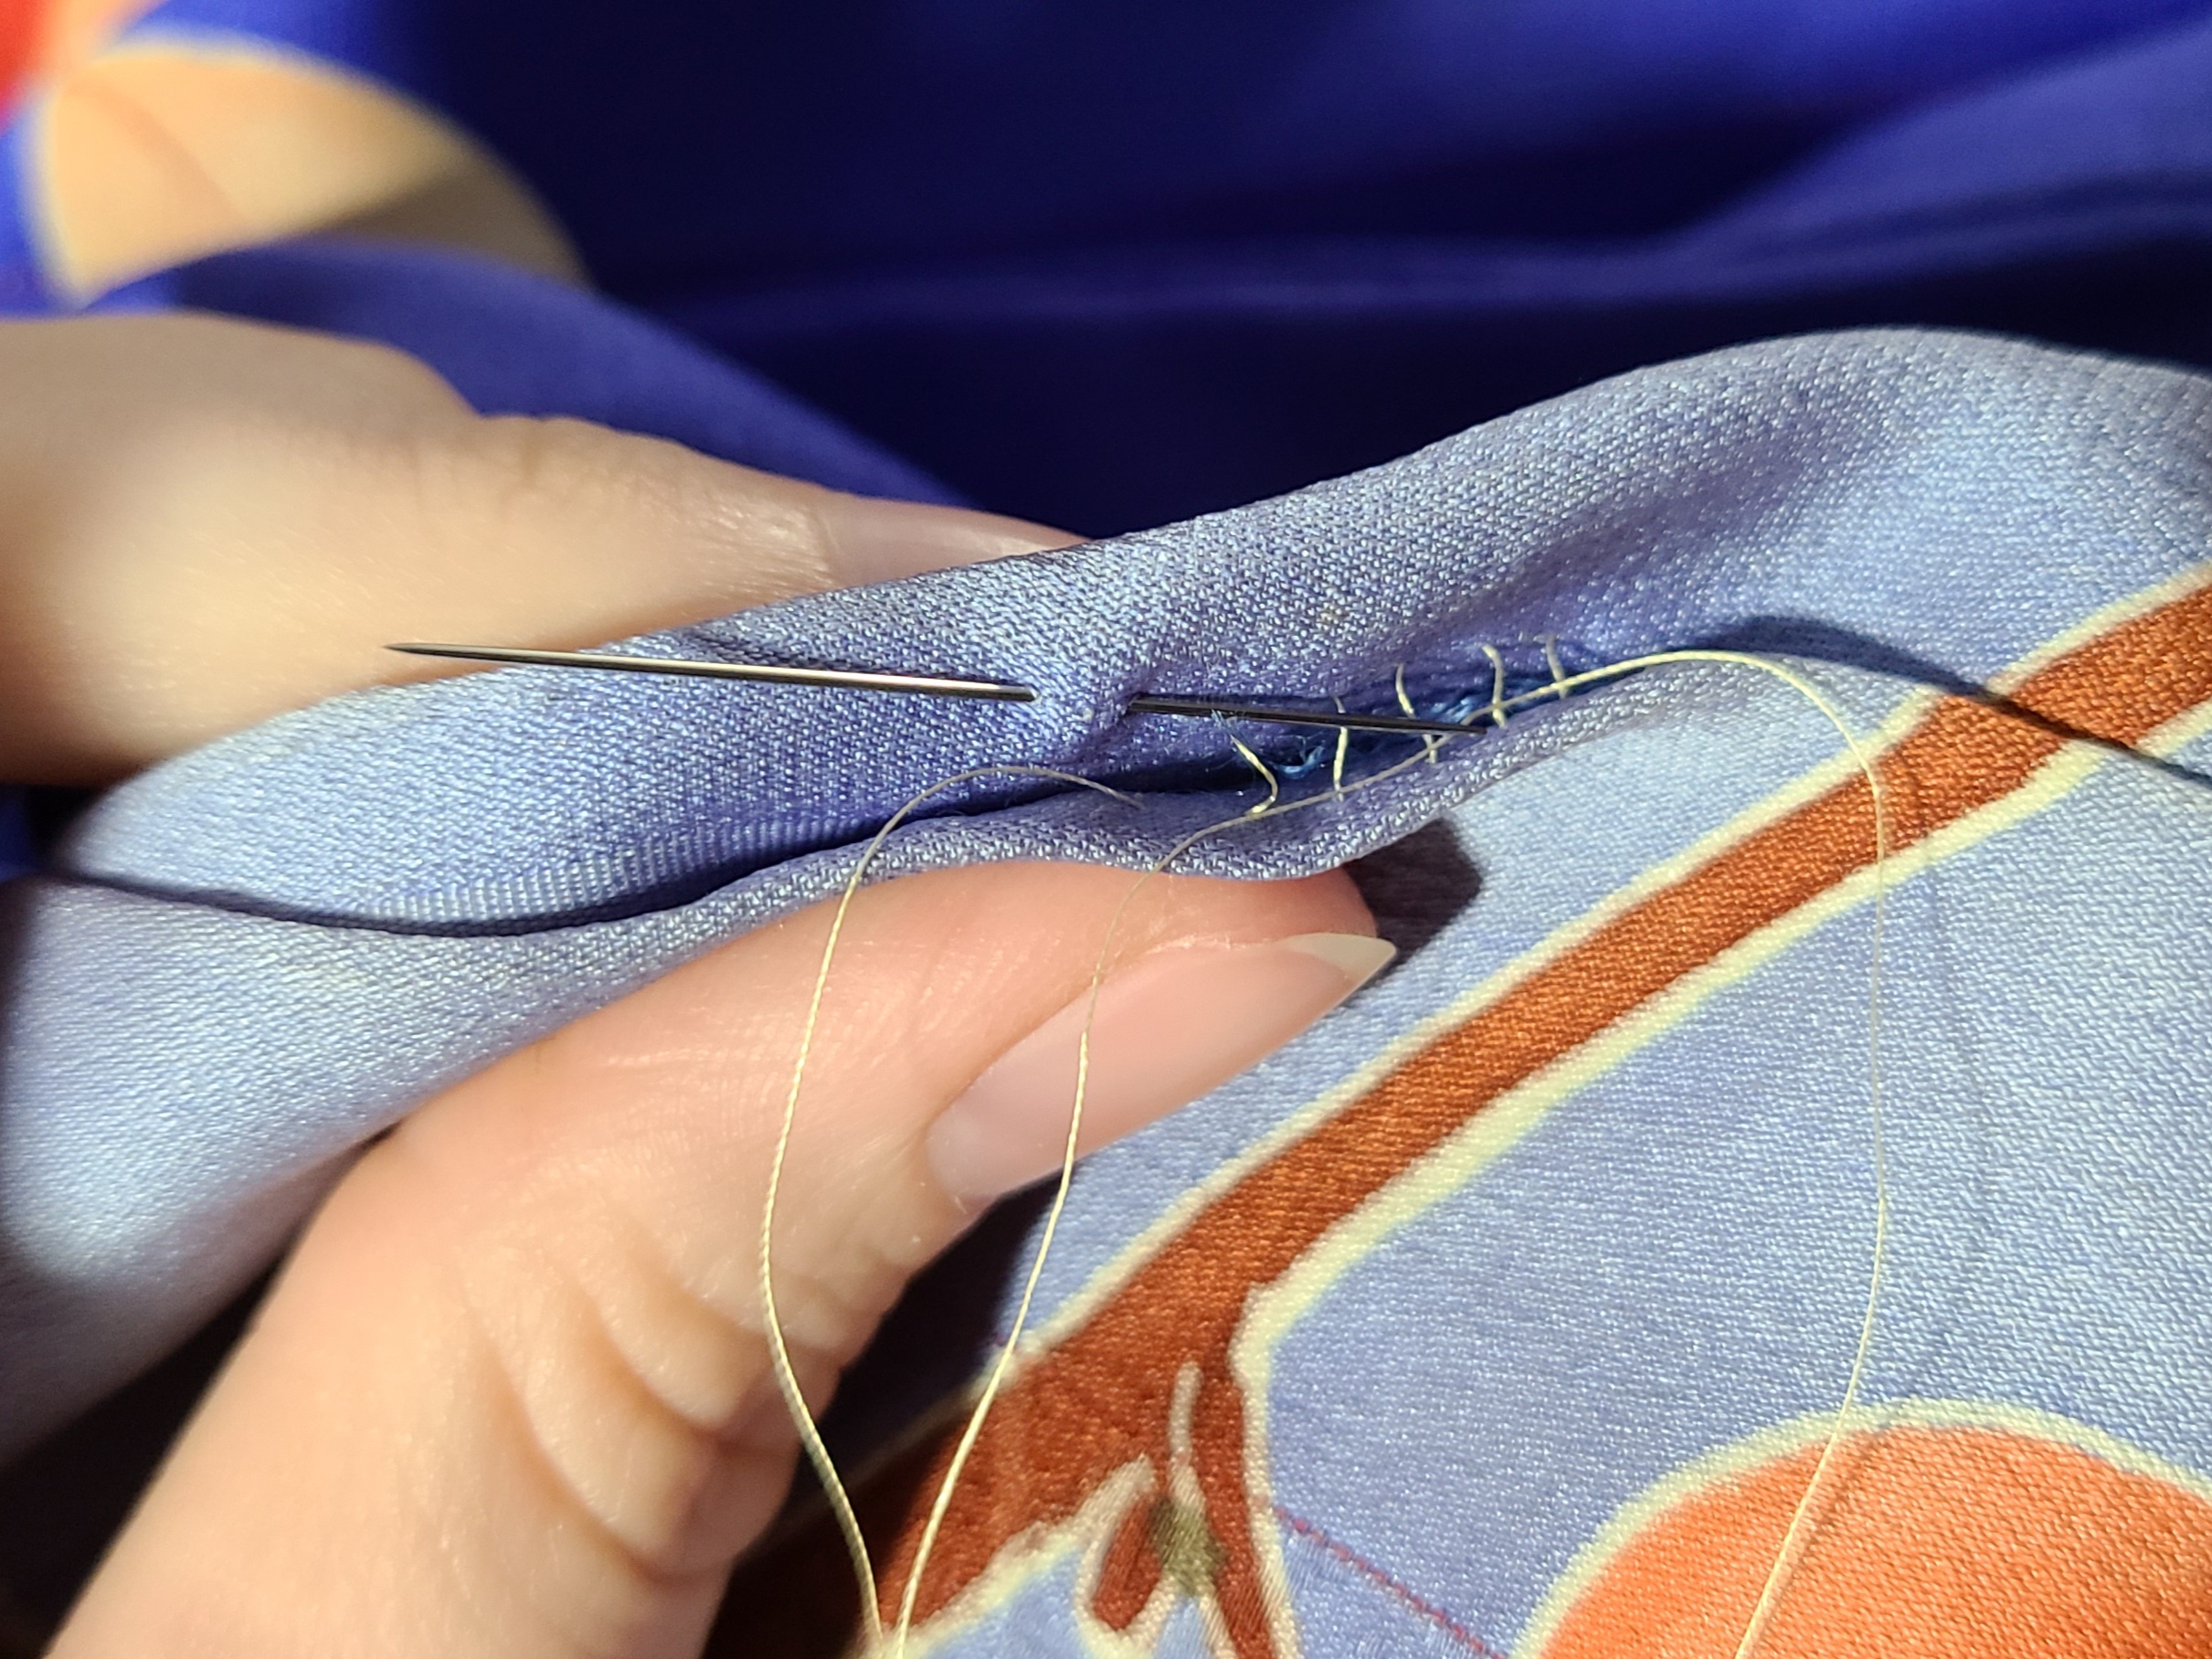
Now, thread a nice fine needle. We’re going to start where the original thread is still poking out. Get under the fold in the silk to come right through that spot with your new thread. Like so:
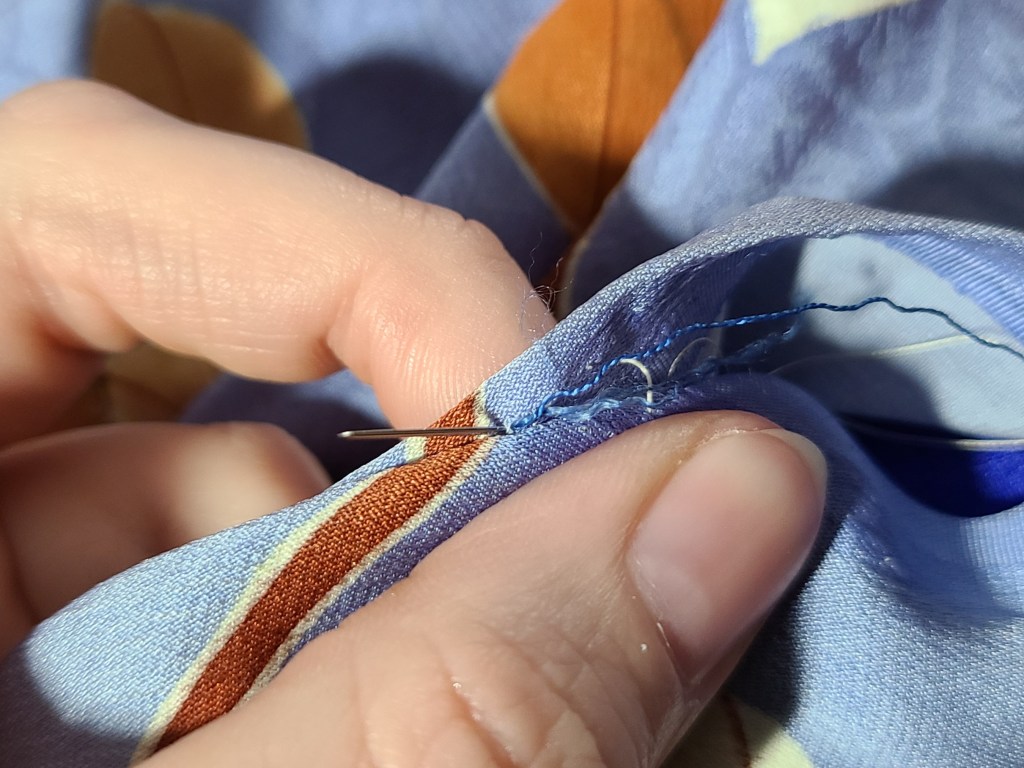
Bring it all the way through, and pull the thread up tight so the knot is right up against the silk on the other side. Now I’m going to make sure that the original thread is properly taut and holding the seam together elsewhere. Now I tie the new thread to the old one. A simple tight knot will do fine, we’re just securing the rest of the old thread.
When that’s done, we can start sewing! It’s a simple ladder stitch, and you’ll find that your needle really wants to go into the old stitch holes. If they’re in good shape, do it! Work smart, not hard.

You’ll notice on kimono seams that many times one panel overlaps another by a few millimeters. Make sure you’re allowing for the same coverage here. Notice how my thread is a bit away from the edge of the seam.
Here’s just an in-action of the needle making stitches that aren’t a video because I couldn’t get a good angle. Look, there’s shit I’m good at, and shit I’m not.
When we come to the other side of the hole we made, we will bring the needle out where the old thread is just like we did when we started. Like this:

Then tie those two together in a nice tight knot as well.
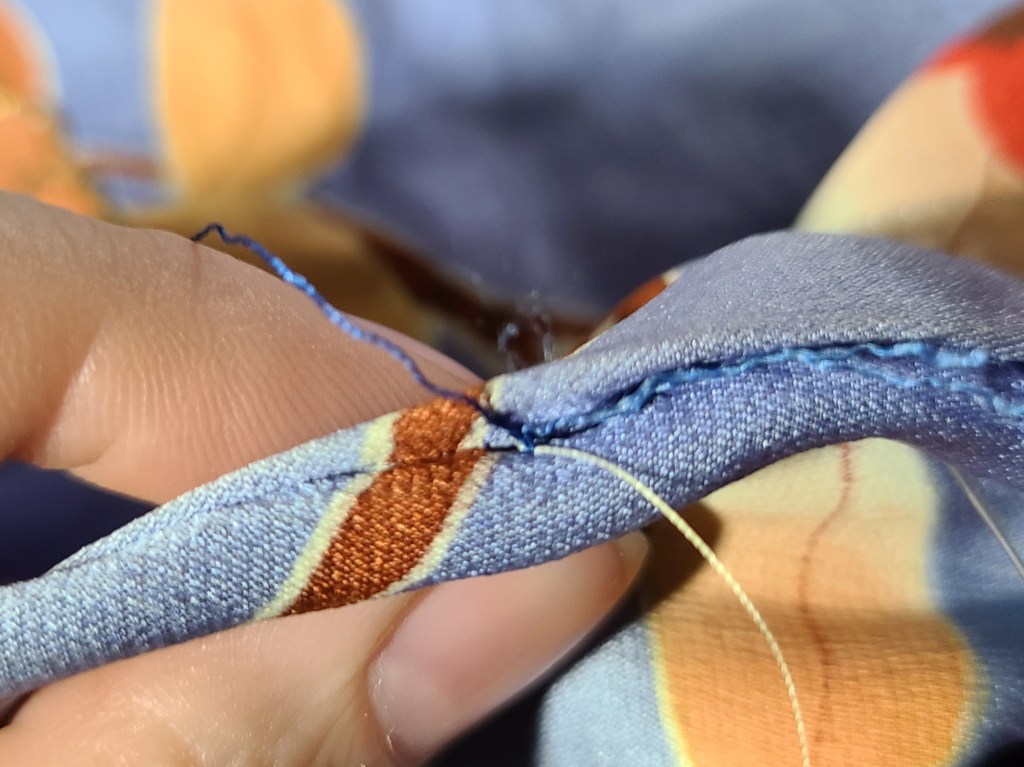
Clip away the excess threads and you’re done! Here’s a picture of the seam laying flat again. I intentionally left a very small tail of the yellow thread so that you can see it in this image. Can you find it?

Sometimes the seam will be a little ripply at first. I find that after a gentle steam, it relaxes and isn’t a problem at all.
You can now repair a kimono seam.
I’m actually going to undo this whole thing and use a thread that matches, because I do still have stains to remove there, but I hope this tutorial was helpful for anyone who needed it!
Questions? Leave a comment or drop me an email! We’ll figure this shit out.
BYE

Thank you for this tutorial! The size seam on one of my kimono just popped, and I was looking for how to repair it. One question: do you use silk thread, or will any fiber do? I have a lot of polyester lying around, but it seems a little sacrilegious to use that on a silk kimono
LikeLiked by 1 person
I recommend you use whatever the kimono was made of if possible. Silk is strong and gentle, cotton is a good second choice. Gutterman makes a silk finish cotton that is really easy to work with!
LikeLike
hi. By any chance do you have a good reference of how to resize a hitoe? I’m so afraid to ruin my kimono forever 😦
I love your blog, thank you so much for all this information ❤
LikeLiked by 1 person
I don’t, but I will!
LikeLike