Before we get into it, I want you to know that I lost my goddamn mind creating this tutorial. I picked this haori to use for this tutorial because it’s one that I want to wear in the super near future, and because of my -looks down- large tracks of land, I would have needed to resize it anyway. LOL bewbs. I’ve resized like fifty goddamn haori by now, guys. This isn’t new shit to me, and I’m not going to sit here and pretend I’ve never come across anything weird in my time of resizing, restoring, or repairing them. But what started out as a regular-ass haori resize that I was just going to document really well for the sake of a tutorial turned into a hair-ripping, maddening journey of having to do fucking surgery on vintage silk. Because whoever originally sewed this thing together was a goddamn psychopath.
So what did they do that was so stressful? Weeeellll, every single knot was tied around the silk shell. Meaning they sewed in several tight stitches DIRECTLY AROUND THE SILK and then tied off the thread in a tight knot directly to the cloth. They didn’t tie a knot onto the thread tight against the silk–that would be normal. They also didn’t use the most common method that I come across and that I, myself, utilize: tying a knot in the thread against a small square of fabric to use against the seam allowance for support. (I document this, if you didn’t understand that sentence, don’t panic, I go over it in detail.) Every. Single. Thread used. Was tied in tight knots to the silk.
What does that mean? It means that the threads have been yanking on the silk and that the woven fibers of the silk itself have been supporting the seams instead of just the thread. It means that:
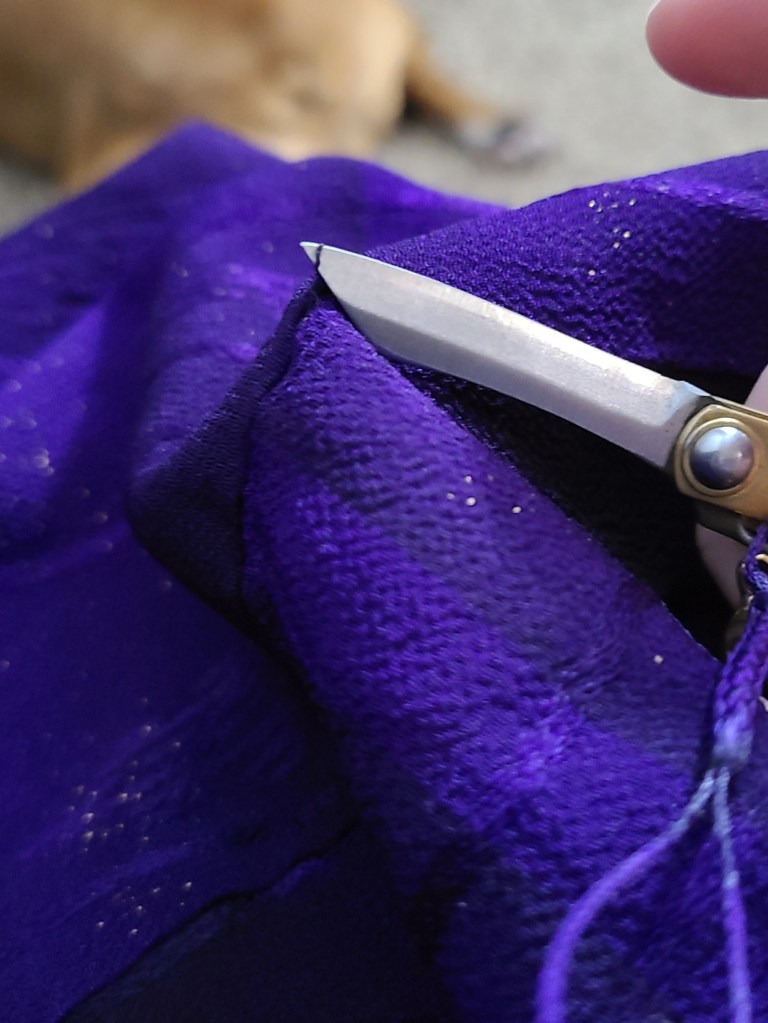
1) In order to remove the threads, I had to get right up against the several-looped knot to cut through the thread instead of just sliding it away like I’m used to. Which means I’m using a really sharp knife right up against silk–big yikes.
2) The silk of the haori was damaged around these knots. Wrapping your thread around the fibers of your garment and then tying it off like that is going to stress the fabric–if you want fabric that stands up to the test of time, then you do not do this. I had to repair several holes because of this, and they weren’t holes made by my knife. They were tears made by the thread having bunched the fabric together away from stress joints like where the sleeves meet the body.
Although, luckily for you, dear reader, is that I decided to document my hole patching technique, and you will get a separate tutorial dealing with that in the very near future. I almost decided not to use this haori for this tutorial because of these problems, but in the end I decided to keep with it. Because if I can prepare you for this insanity, then your first shot at resizing will be a fucking cake walk. You’re welcome.
Something to note before I begin is that this is not necessarily the most traditional way to do this. I disregard a few shape conventions in favor of sizing sometimes, and I also don’t take the entire haori apart to resize it. I am also known to pull some shenanigans with the lining to make everything sit nicely (I’ll get to that). If you’re a purist, find your tutorials elsewhere. A kimono is a thing to wear, and the biggest tragedy in your collection is the one hiding in your tansu/closet because you’re precious about an angle. Fight me.
I’m actually just joking with that level of aggression. If you want to stay by the book, then that’s your call. Respect. Live your truth, my friend. But what I can tell you about my method is that it is a completely non-destructive alteration. That’s right! As long as the haori in question is in good shape, and the person who originally sewed it together is not a goddamn psychopath, then everything I do to it is completely reversible. You can resize it my way, and even put it right back the way it was later. No harm, no foul.
Now with that out of the way, let’s begin!
You will need:
Scissors, a really sharp knife, a strip of cloth you don’t care about, thread that matches your haori okayish (I’m using black silk), a sharp-ass needle, an iron with a steam function, an ironing board, sewing clips or pins (I use clips), and a fuck load of patience. Got it? Fantastic. LET’S DO THIS.

I have selected a haori that I purchased recently. The person I purchased it from might very well be reading this, and I have a message for them: I absolutely do not hold you responsible for any of the insanity that I found inside the seams of this thing. We’re good.
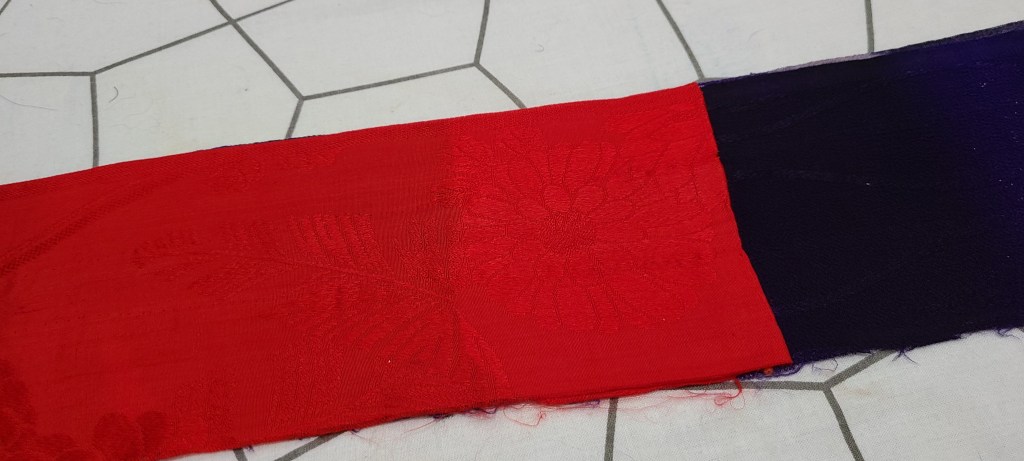
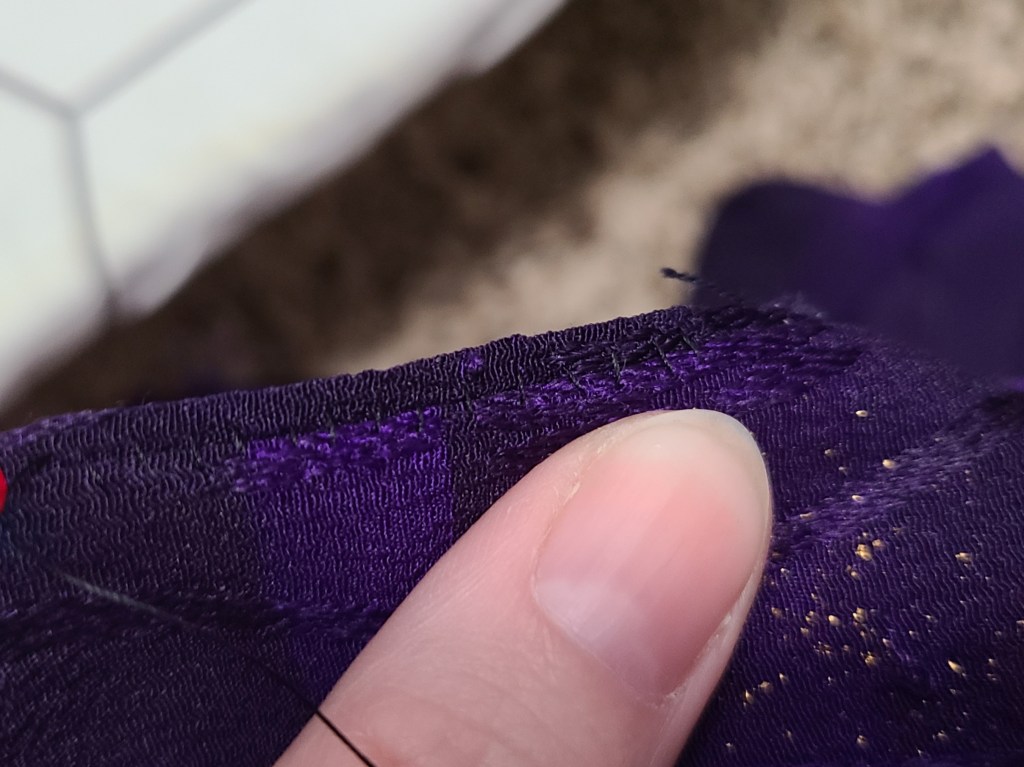
As an antique piece, this one was pretty small. I took a giant swig of Big Dumb Idiot Juice right before I got started and didn’t take measurements of it pre-alterations. Sorry. I did, however, take a photograph of the size of the seam allowance! So we have that going for us! The seam allowance was almost three whole inches on each panel! That means we had a lot of room for expanding, and the results will speak for themselves.
FIRST! Let’s find a good spot to grab ourselves a thread and break it. We will begin on the side panel:

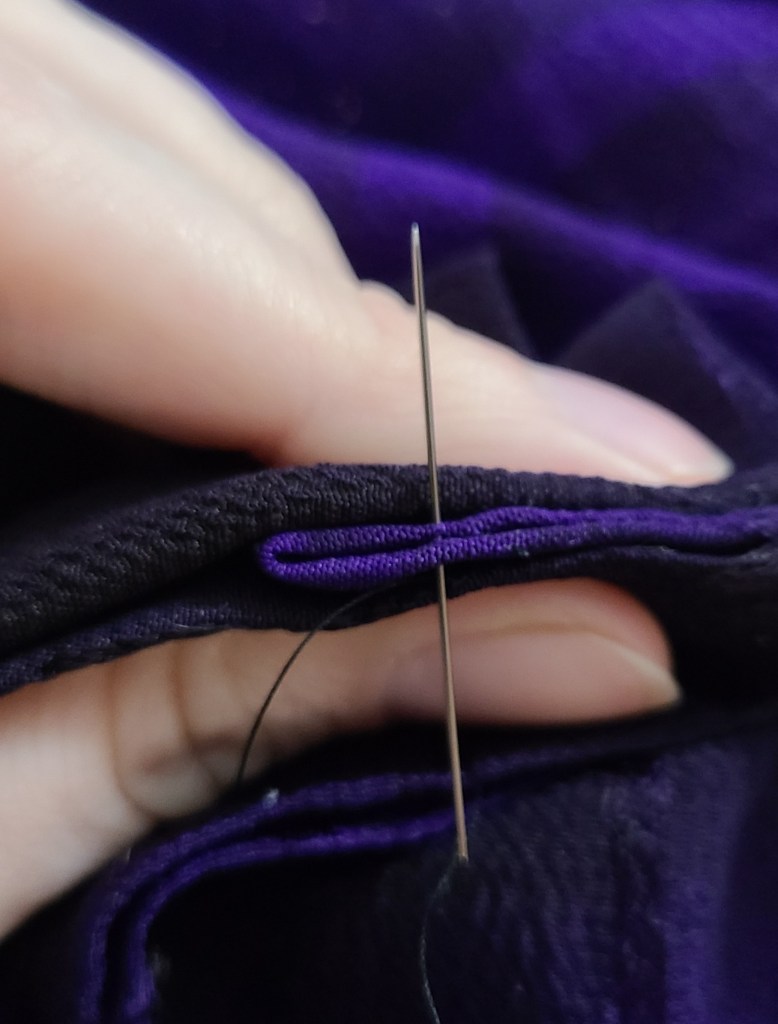
We’re going to break a thread so that we can start removing the original stitches. Some people like to use seam rippers, and you can do that if you want to. But I don’t–I literally remove the threads by slipping them through. This can take some time, even though I can often just pull the thread through several stitches at a time, but it’s the least risky to the integrity of the fabric. On vintage items, that matters.
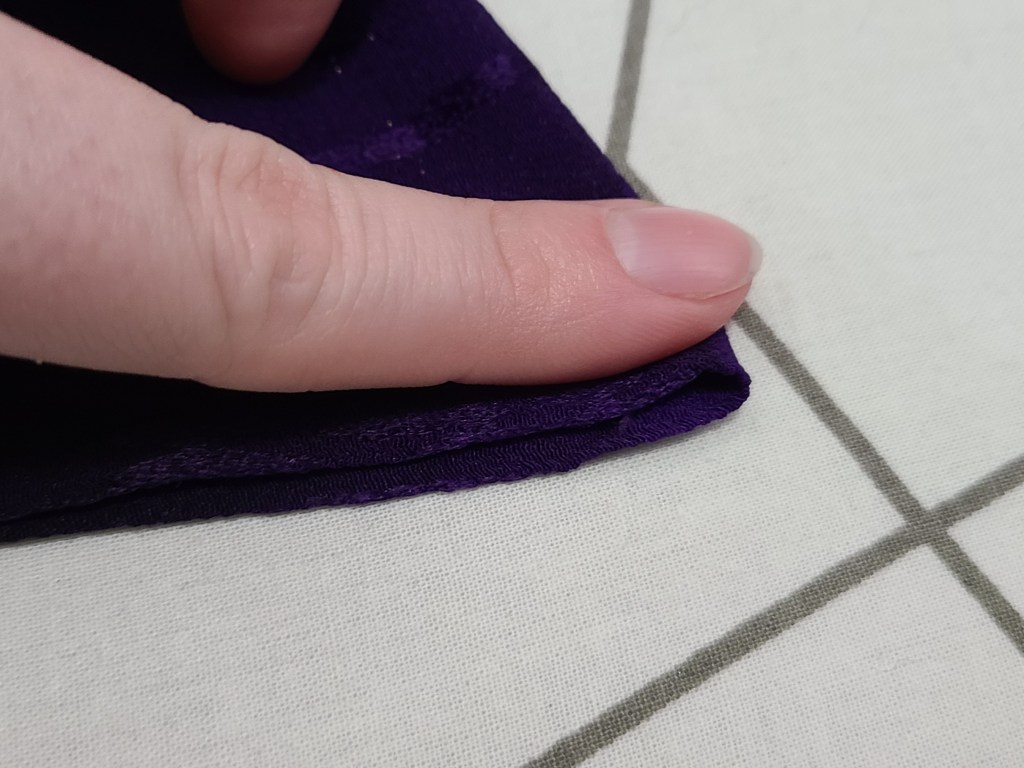
To break a thread, I scoop the back of my needle into the seam allowance to pull up the thread. This bunches up the fabric quite a bit. Don’t worry about that right now, because we want enough of this thread exposed to cut it safely. Like so:

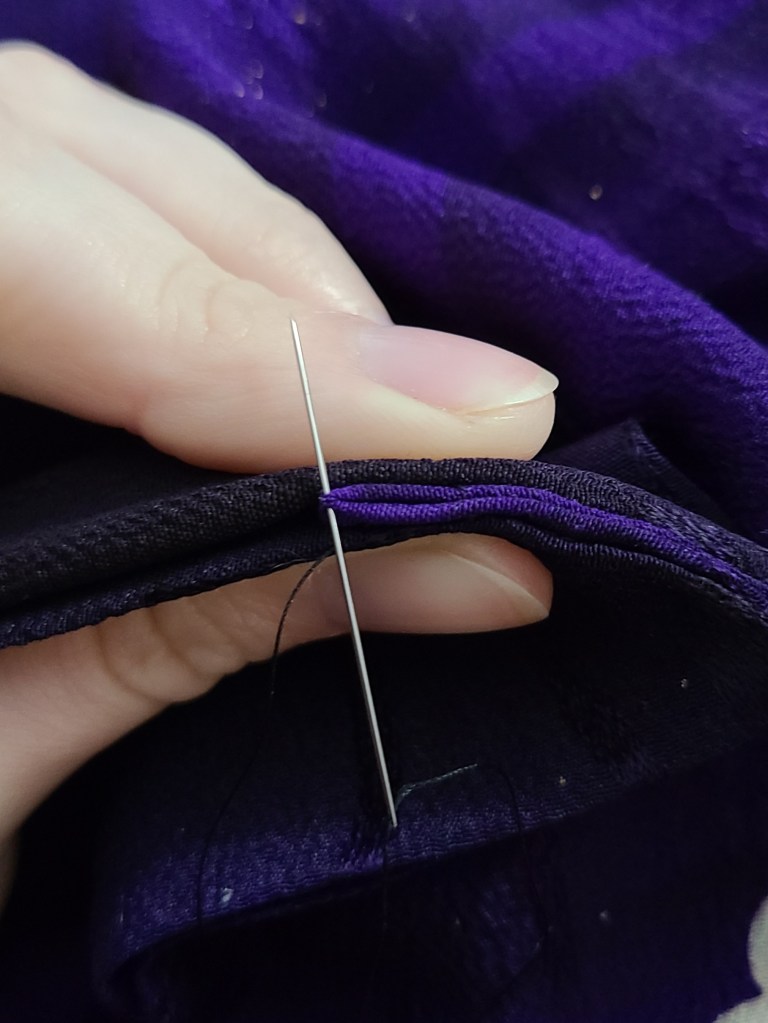
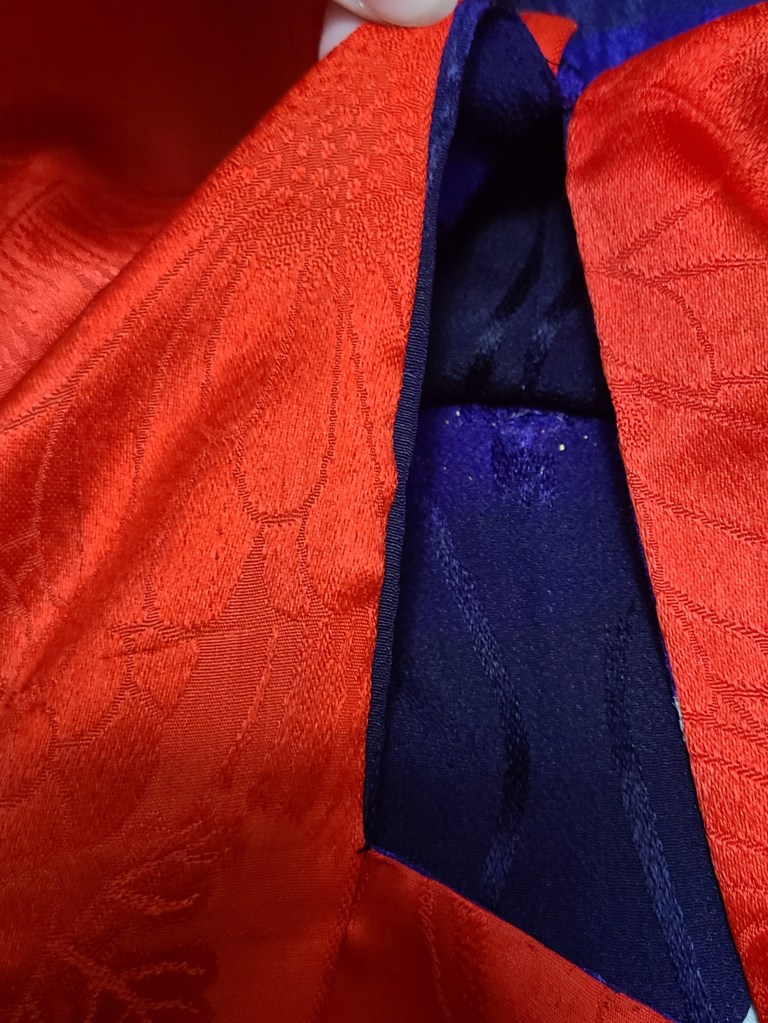
When that thread is severed, you can now easily start separating the seams. Some haori have both the outside and inside panel sewn over the side panel with one thread–this is most common on newer haori. A lot have threads riding up both sides, though. So you might have to do this like eight times for the side panels. Every time you encounter threads that won’t slip right now, you’ll want to cut them like this. We can see the way that the silk panels are sewn together pretty clearly once the panels open up. Check it out:

It’s actually a very simple stitch, isn’t it? Take a breath, young padawan, because pretty much the whole goddamn thing is sewn together like this. If you can make that stitch, you can sew a kimono. Rock.
You’ll remove the threads like this from the panels to free them completely, detaching them completely from both the shell and the lining. You’ll also free the sleeves from the garment completely. Remove the threads in this fashion from the sleeves and the lining joining the sleeves to the garment. I didn’t get a good picture of this, because again with the Big Dumb Idiot Juice, but the area between the side panels and the sleeves has the lining just sewn to the shell. When the haori is whole, this is where the arm holes are below the sleeves. Undo those stitches, too. We want the shell to be wide open.
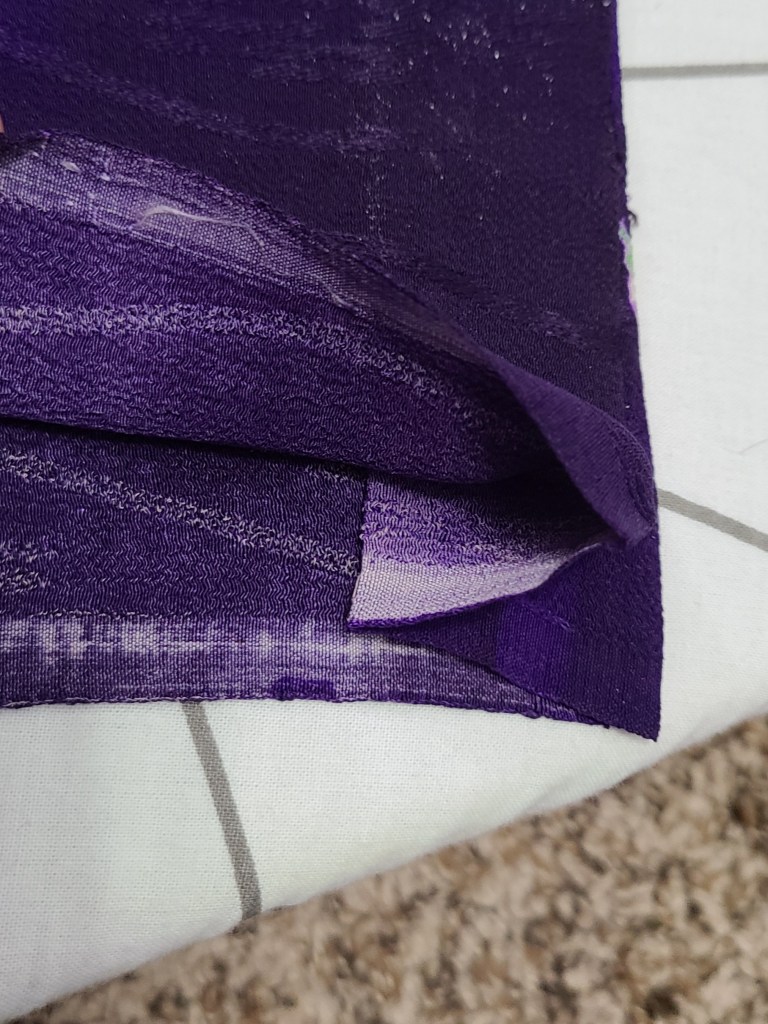
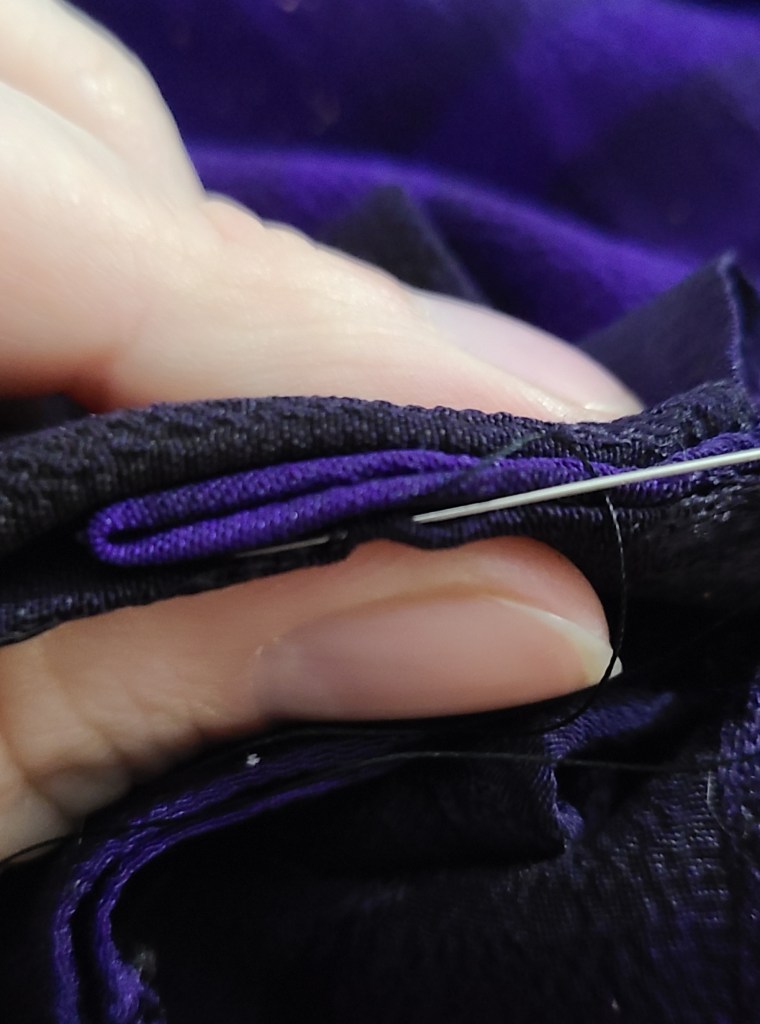
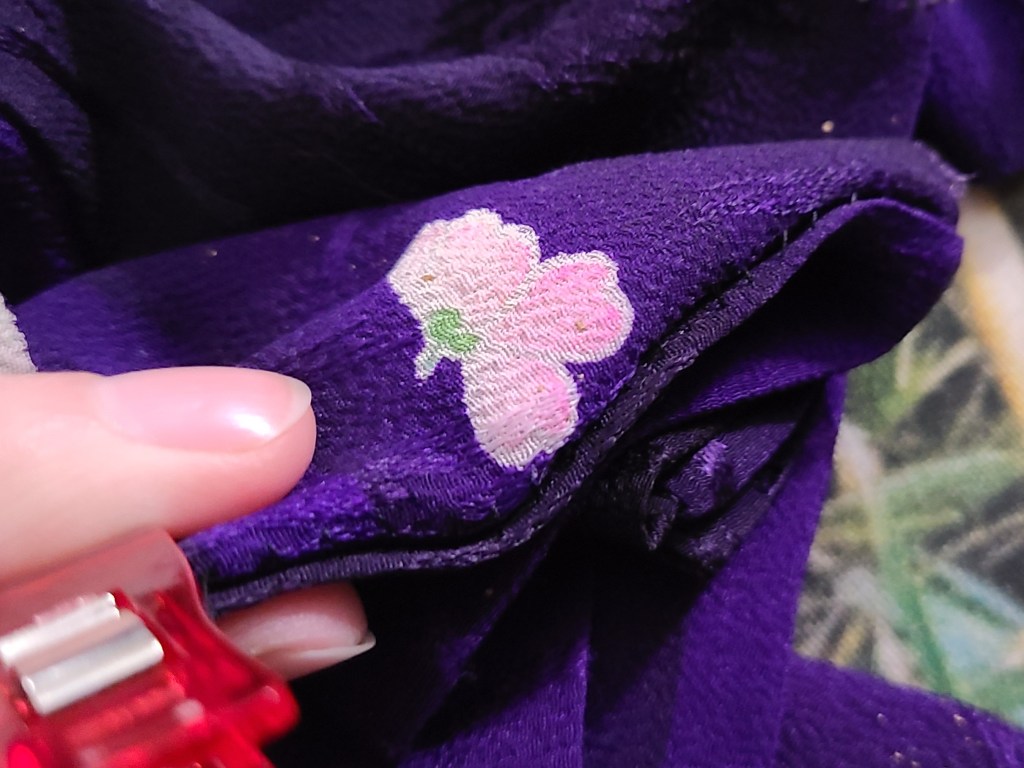
By the way, this is the shit I was fighting with the whole time I was taking this apart:

Look closely beneath my finger where the black thread is joining the purple fabric to the red fabric. Look how tightly that knot is wrapped around the red lining silk. See the stress around the fabric because of that knot? That’s why we don’t do that.
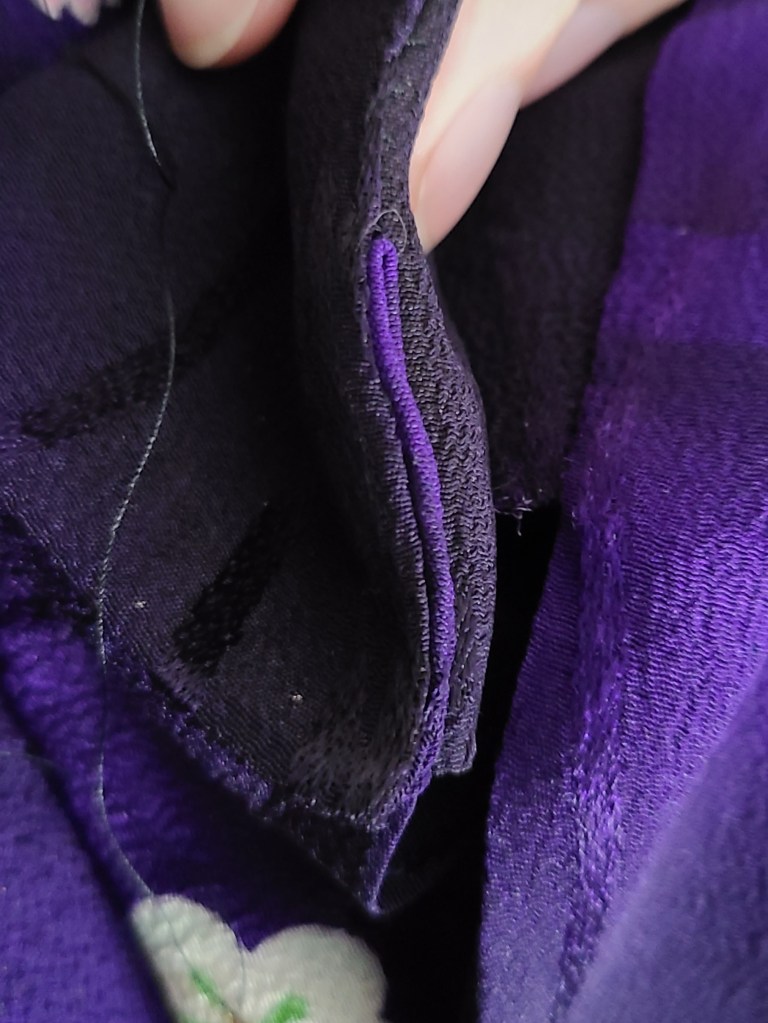
After taking some time to pick apart seams, you will have two removed sleeves, lining intact, and two removed side panels, lining intact. (Note: Some haori have the lining tacked to the shell at the top of the side panels, and some don’t. If yours doesn’t, it might be a good idea to do that so they don’t slip around too much.)
Now we’re breaking out the iron! HOT.
Lay your side panel on your ironing board and straighten it out as best you can. We’re going to give it a low heat but steam treatment. If you’re uncomfortable with putting the iron directly on the silk, that’s okay. Use a towel over it or a press cloth. I go directly onto it because I’m super familiar with the process and this iron, so I’m confident. Iron both sides. We’re trying to relax the fabric a bit to close up the old thread and needle holes. Like so:

Now, my fabric had been abused, so my relaxation results…aren’t great. But you can see the differences in the before (left) and after (right) of the steam treatment. Do this to both side panels.
When the side panels are nice and smoothed out, go ahead and set them aside somewhere safe, so they don’t get wrinkled. We aren’t going to need them for a little bit yet, so they can have some time to ponder their place in the universe. Or, as I said to mine because I was extremely frustrated by the time I got to this step: SIT OVER THERE YOU UNFAIR WHORE.
Because I am a healthy and well adjusted adult, and no other reasons.
Moving on.
Now let’s take the body of the haori, because it’s time to remove our old seam allowances and iron in all new ones! Have a break if you’ve been working straight through to this process, because this can be hard the first time you do it. I feel like it’s all about learning how to hold things, so I tried to take as detailed photos as I could.
Had a break? Maybe a snacky? Got a drink? Hydrate! DO IT. Okay.
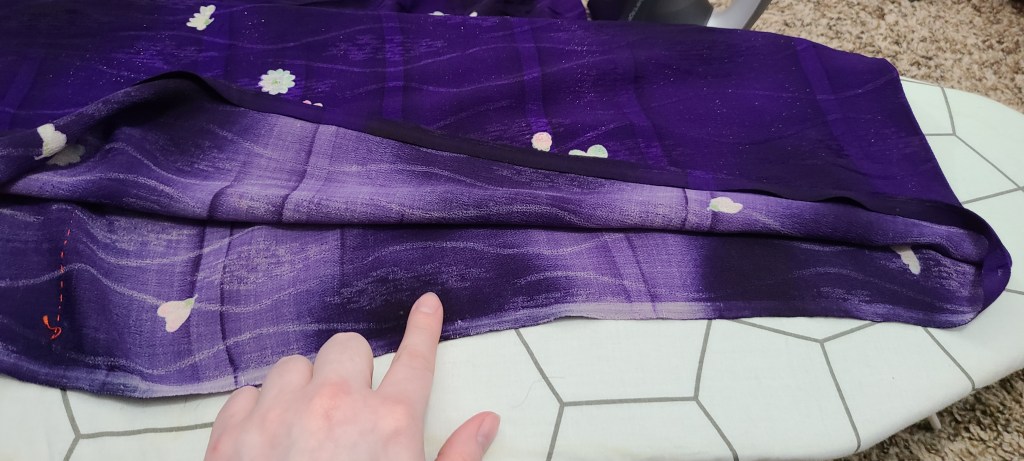
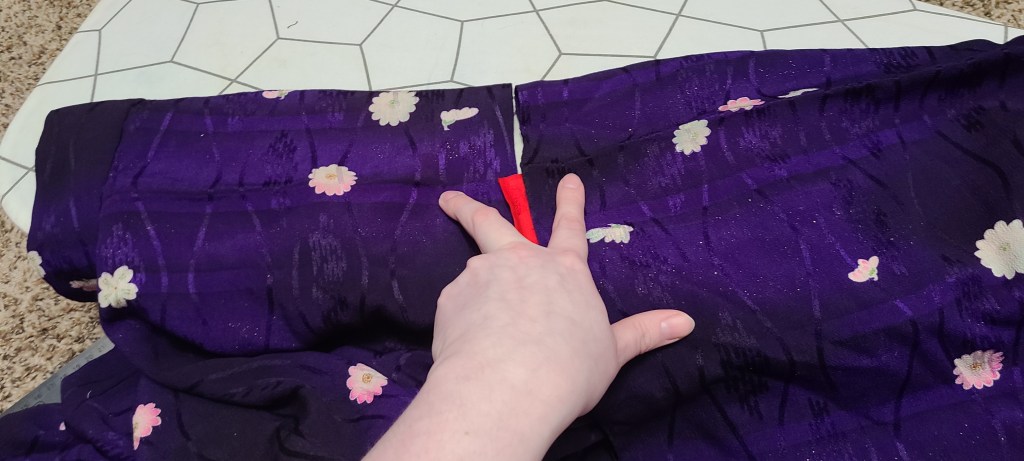
Let’s lay our haori’s body onto the ironing board and have a look see:

LOOK HOW MUCH FABRIC WAS HIDING IN THERE. YOUR GIANT TIDDIES WILL GET INTO THIS GARMENT YET!
Here’s that photo of the seam allowance measurement I was talking about. Do something with that:

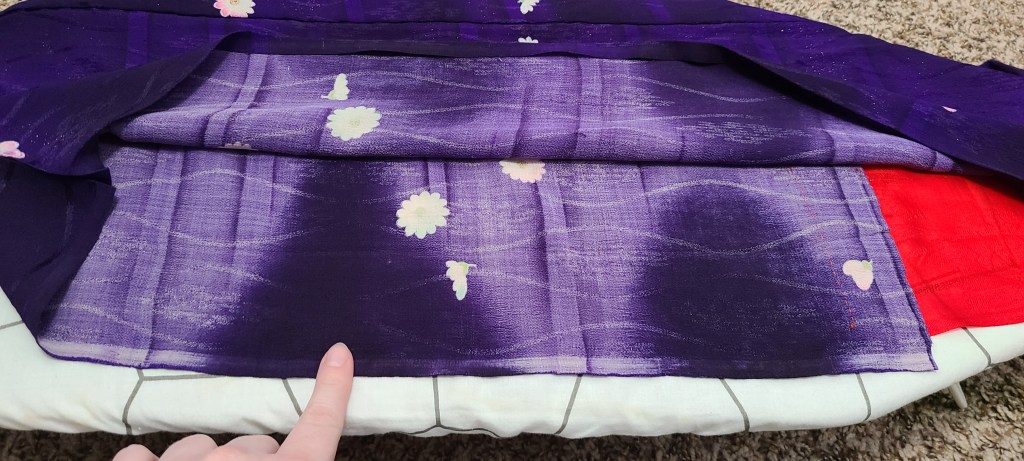
Now we will iron out the seam allowance. First I will peel whichever side is on top back so that I can place the iron on the “reverse” side of the bottom most panel. Flip it up like this:

Gently steam iron along the folded line. I chase it all of the way to the bottom but leave the crease at the hem alone. We’re going to deal with those separately. I go all the way up and over the shoulder to the other side of the garment, then I flip the haori over and do the same thing to the other side. Ironing out the seam allowance in the same way.
Exercise a little caution in the shoulder region. You don’t want to fuck yourself and iron out the creases on the shoulders that lead to the collar, because those are going to be very helpful later when we attach the sleeves. Ironing them out a touch is almost inevitable, but if you accidentally annihilate one, put it back right away.
On some garments, especially silk blends, the original crease doesn’t immediately go away, even if it’s mostly flat. That’s a problem that I find works itself out over time, so don’t stress out about it too hard.
Now that the seam allowances are flat, we’re going to iron in new ones by folding a specific width of the silk back in. If you’ve never done this or anything like it before, I suggest you work slowly and use a measurement guide. White charcoal and a ruler every few inches is a big help for this.
I admit, I eyeball it, because I’m frighteningly good at just eyeballing measurements.
In all cases, you want at least 1cm of seam allowance. Anything smaller than this will cause you a lot of grief during the sewing process.
We’re going to iron in the new seam allowance the same way we ironed them out, by keeping the garment flipped open like a book and working on the “reverse” side of the fabric. Like so:
While you do this, make sure you’re keeping your lining in mind. Now, the “correct” way to sew in the side panels for a haori is at an angle. You’ll have noticed when you took your haori apart that the seam allowance at the top of the side panel was significantly smaller than it was at the bottom. Sometimes the original creator of the haori left enough lining for you to disregard that and make it fully straight–which isn’t traditional but gives you a lot of room. Sometimes they don’t, and you will be forced to angle your seam allowance inward toward the lining. I’m a fucking stinker and will allow for the seam allowance in the lining to be less than half a centimeter just to get as much room out of it as I can, but do what feels natural to you.
Now that all of your new seam allowances are ironed in, let’s address those folds at the hem of the garment. There’s two folds on each side of the side panel–one looks like just a normal fold, and the other is layered like an accordion. Here’s how to handle both of those.
For the one that’s just a little taco fold, simply jam your finger against your new seam allowance and trace it all the way to the bottom. The fabric will fold in against your new seam allowance, and when your finger comes to rest at the fold of the inside of the hem, the taco will now be bent in the correct direction. But it’s not stable! It needs therapy. It needs to be ironed flat to sit nicely. So hold your finger over the new fold, and set your iron on the hem. Slowly bring the iron up to replace where your finger is sitting.

Let the iron sit there for a second, and that angle is now nice and crisp. You’ll do that for both of the little taco folds.
Now for the accordion looking folds, they’re a little more complicated, but it’s not too hard once you figure out how to hold it.
How the hell do I even describe this?


I sat here for awhile trying to figure out how to explain those photos. God I hope they’re clear. Basically you take the corners at the bottom, and fold them on top of themselves, then press them against the board so they stack on top of each other. I posted the photos in order. If I think of a better way to explain that shit, I’ll come back and edit this, but my best advice is to study those. Then put an iron on it for a second. Then go do it again, because there’s two of these motherfuckers.
Did you survive that part? Did you survive all of this? How are you doing so far? Work treating you okay? How’s the family? Did you hide the bodies alright?
I have good news. We’re done with that part. We get to sew some shit together now. We survived this together.
Okay so sewing clips vs pins. I guess it doesn’t really matter. I like clips. If you sigh really hard with a sewing clip in your mouth, you probably won’t end up with it in your lung, so there’s that. I also feel like they’re the least destructive way to go about his, and they can hold several layers of fabric very accurately together. But I need you to use the item you’re most comfortable with because this part very much relies on accuracy.
I like to start inside out with the side panels. Pin or clip up your panel like this:

When I align my side panel with my new seam allowance, I usually tuck at least the same width of side panel as there is seam allowance. You can go a little less or a little more depending on the integrity of the edge of the fabric. Basically I tuck at least a half a centimeter of the side panel into the seam allowance.
Thread your needle. I never and have never tied a knot around my needle with my thread, but you do you.
Remember that shit up there I was bitching about, where I said the original goddamn psychopath who sewed this together didn’t use any cloth squares to anchor their threads? This is the part where I tell you just what in the fuck I’m talking about.
If your haori had these fabric squares in them, then you pulled them out with the threads you removed when we started. If it didn’t, this is why I included some random cloth you don’t care about in the materials list. Because we’re tying the very end of the thread to it. LIKE THIS:

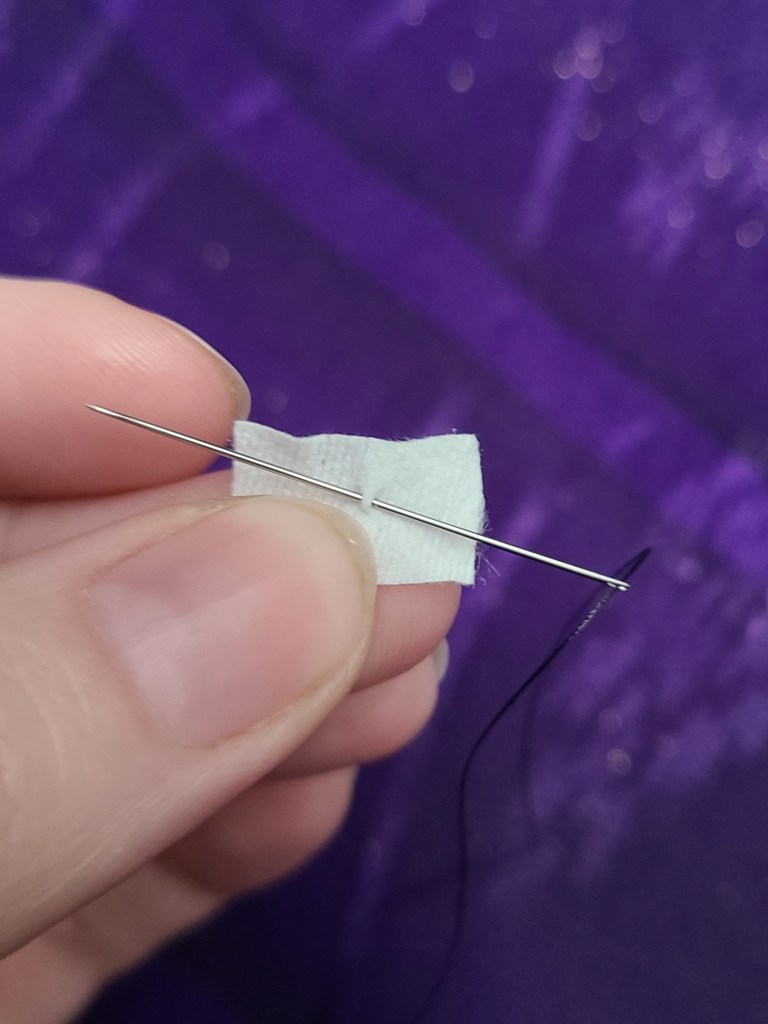
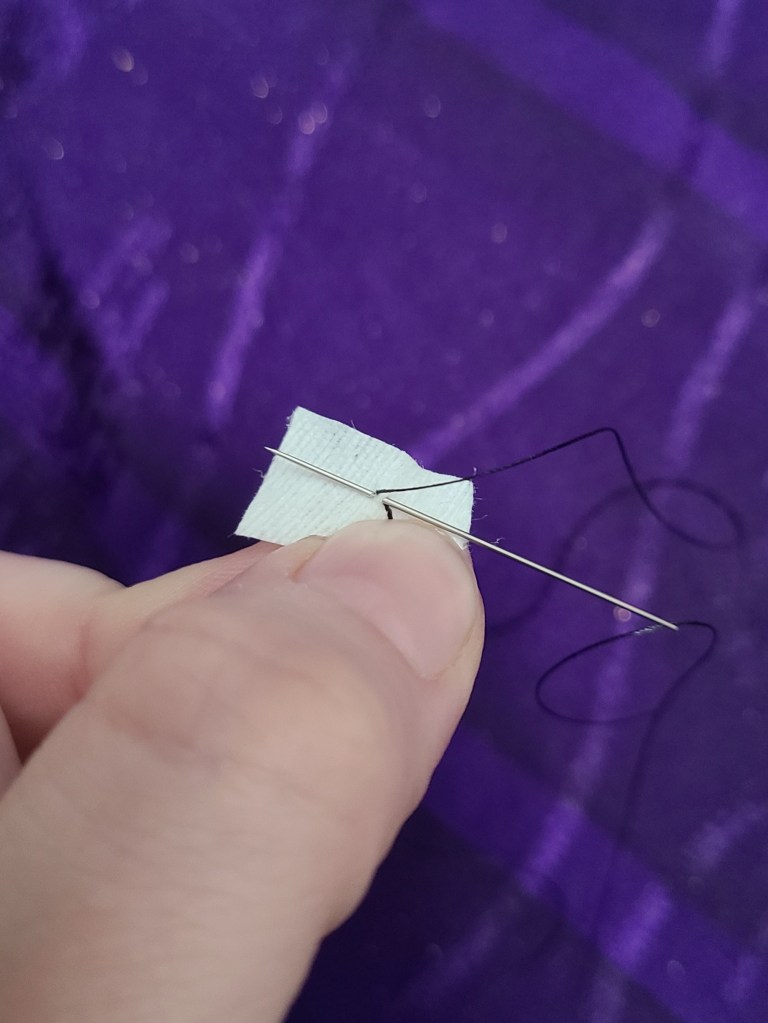
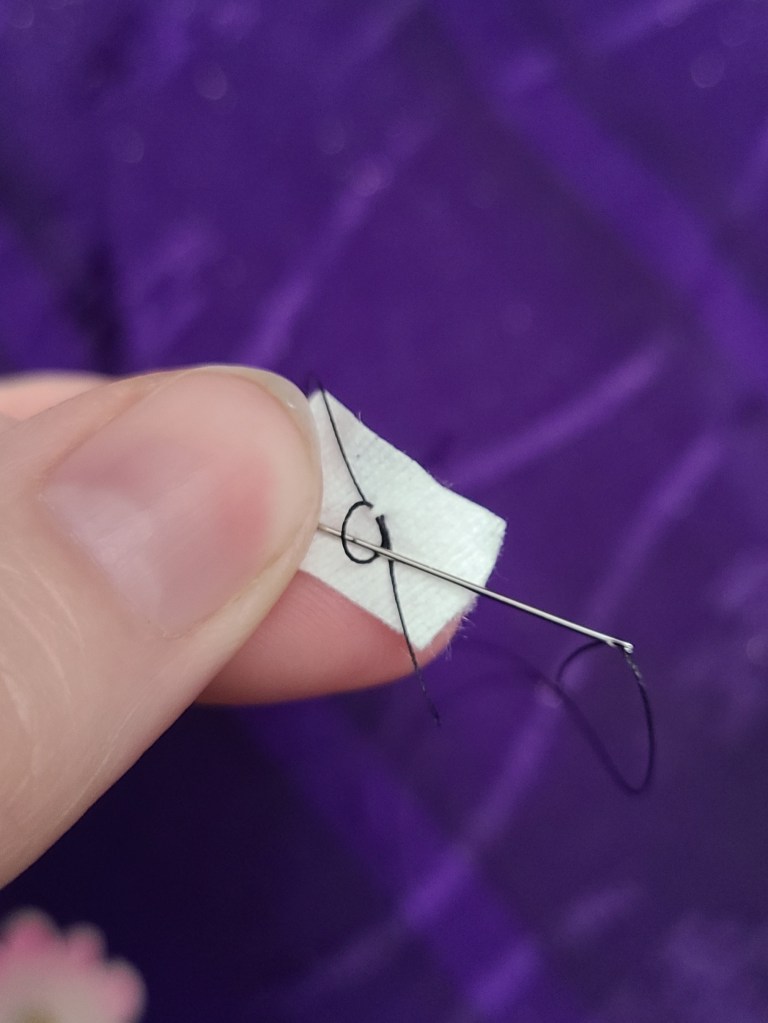
Is your thread secure? I took a page out of the goddamn psychopath book and tied my thread directly to the little square out of SPITE, but you can also just put a knot in the end of the thread. I guess it doesn’t fucking matter in this case, huh?
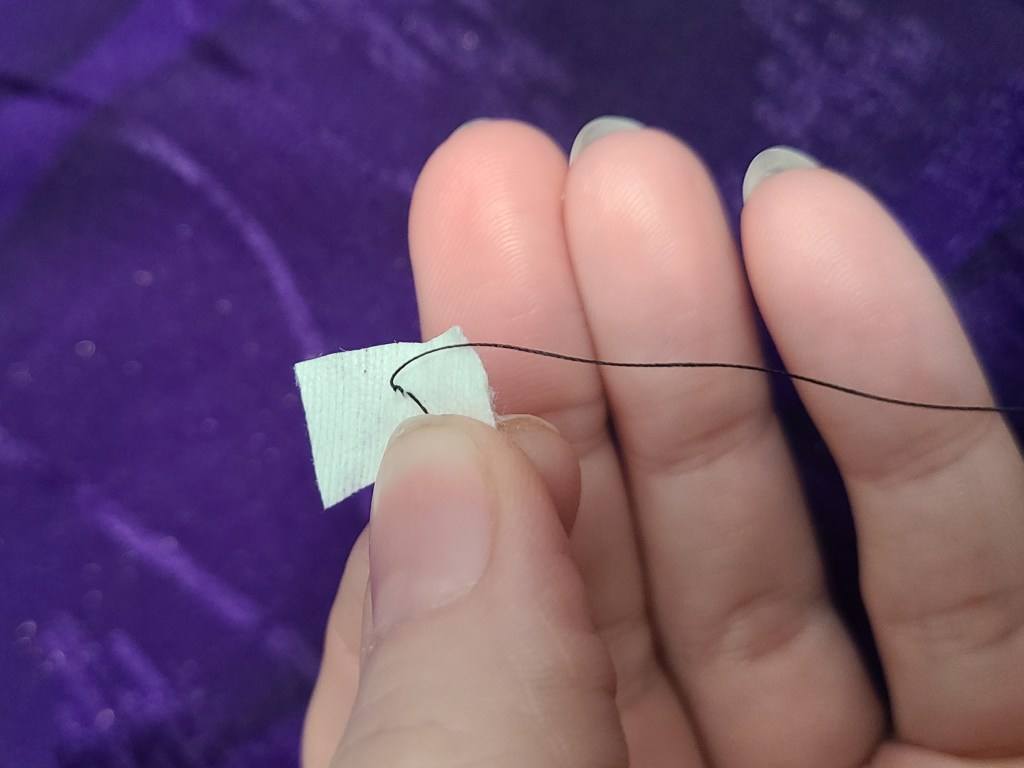
Okay! You’re going to take that square and dip into your seam allowance! To do this, I remove the clilp at the bottom of my prepared row, and I fold the silk inside out to punch the needle through. Make sure the needle comes out on the side of the seam allowance facing INWARD. Then pull the thread through. The cloth square will come up against the fold we’ve ironed in and will be our anchor and support for the thread. No stress on the silk. Like so:


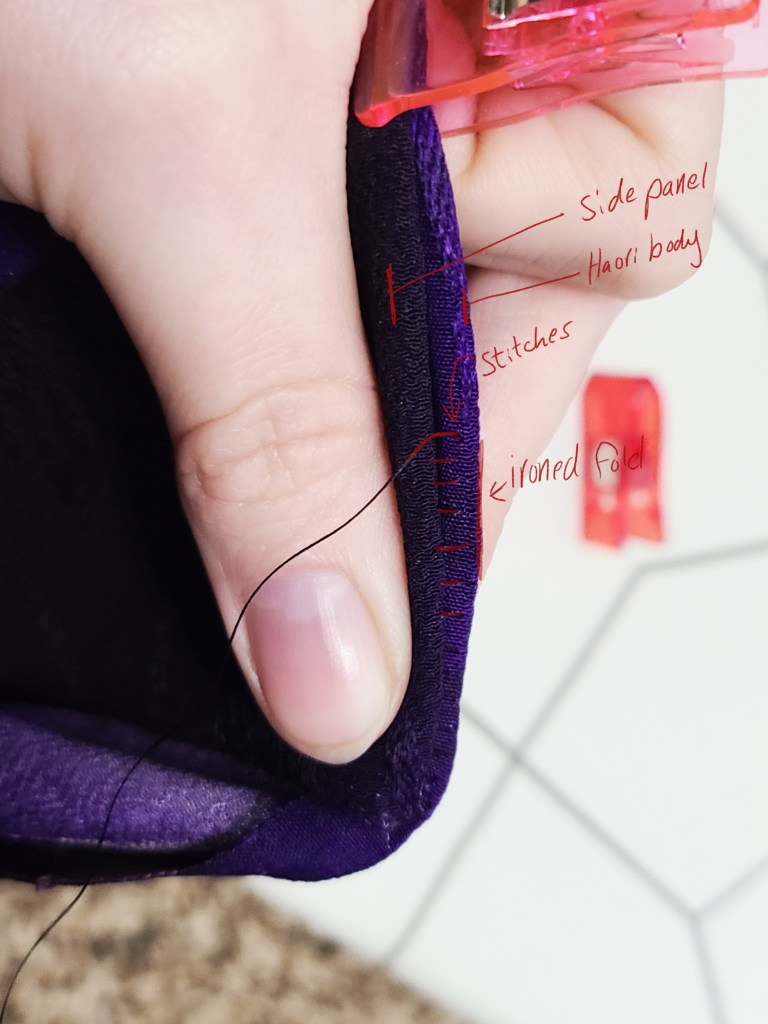
Now let’s start sewing. I do this a little differently than I would if I were sewing a whole kimono together, but it’s accurate and effective, and you don’t need to be a great seamstress to have great results with this method. You’re going to make small stitches, no more than two or three millimeters apart, and go back and fort between the inside of the seam allowance and the side panel. You want to be sinking your needle into the seam allowance about one to two millimeters beneath the ironed fold, so that your stitches are completely hidden. I marked up the picture I took to make this clear. I like to get a few stitches in and then pull the thread tight a little bit at a time. This allows for the fabric to lay so perfectly, the way we know and love. Like so:
Basically, you’re going to keep doing this FOREVER. Congrats. You’re sewing a fucking kimono. How is it? It’s really not so bad.
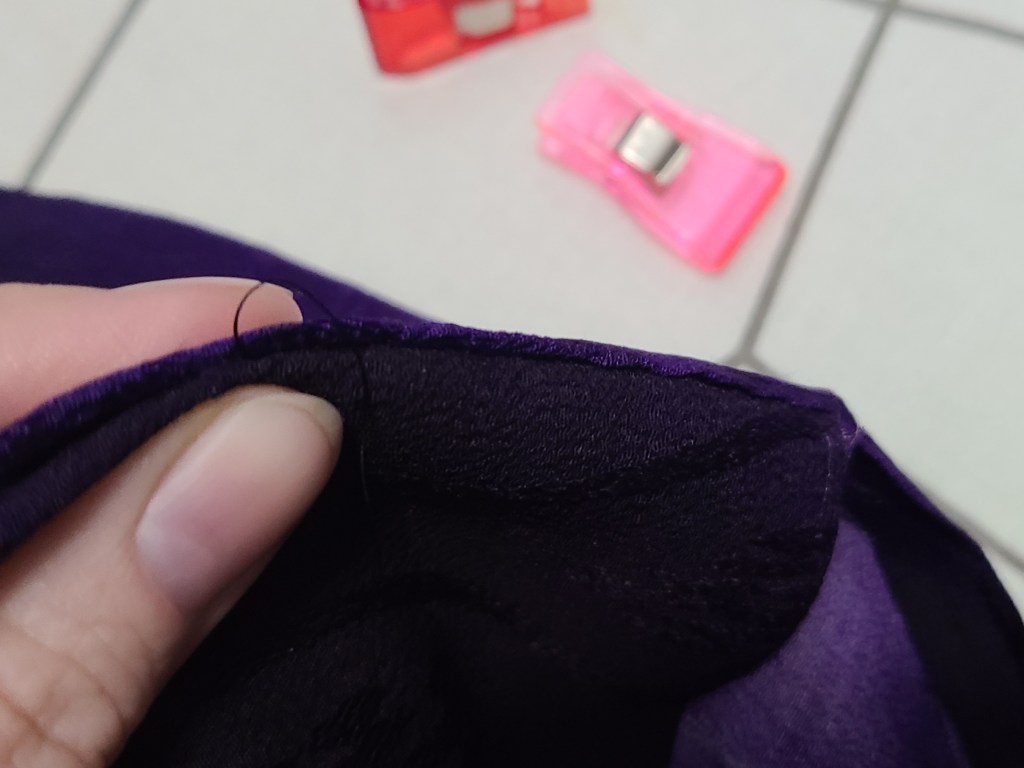
Do that all the way up to the end of the side panel, then tie off your thread. You can use another piece of cloth to do that if you want to, but that’s harder. I like to just pull the thread tight and knot the thread. It takes a little practice, but you can actually just loop the thread a few times close to the fabric, and then pull your needle through it and make a knot that’s pretty flush. If you choose to tie the thread to the fabric directly as I had -ahem- described…you can, but know that you’re going to put a lot of stress on the fabric by doing that.
Now let’s do the side with that fucking accordion fold! It looks scary, doesn’t it? It really isn’t, though. You’ve got this. So do another length of thread with a cloth square at the end. Clip the next side to the side panel, including your accordion fold. This fold goes on the INSIDE of the haori, so the side panel should be sitting between the outer most folds. Now run your thread up the seam allowance just like we did on the last side, to seat the cloth square into our little fold. Now we’re going to pass the needle between the layers of the fold. Like so:


Once you’ve cleared the end, continue sewing just like you did for the other side until you hit the top of the side panel. You have now reattached the inside of this side. FLIP IT OVER.
The reason I do the inside first is because once the inside is sitting nicely, the outside just wants to cooperate. And arguably, the outside matters the most. Go ahead and line up your next part with clips or pins, and get another cloth square ready. You’re going to start every thread with a cloth square.
The outside tends to be easier to hold because you can fold it over the work you did on the inside. Like this:

They lay on each other so much easier when the inside is tacked together.
Once again, sew both side up to the top of the side panel, then tie off your thread.
I didn’t take a picture of this part, and in truth I’ve neglected it before–you know that little accordion fold we spent so much goddamn time with? Down on at the hem, there’s a little bit of open cloth now because of that, you’ll see it right beneath your side panel. You can tack that back down now. It’s also not the end of the world if you don’t.
Now do all of that shit all over again on the other side.
Your side panels are on! Try it on. I know the lining is still bouncing around a bit, and your sleeves are still off, but have a feel for it! Every haori is different, but since there are often several inches of play inside of the seam allowances, you’ll probably find that you can almost completely cross the haori like a dochugi or a kimono! YAS.
Okay let’s get to those sleeves!
First, remember the creases on the tops of the shoulders I told you to be careful about? Line those up with the creases on the tops of the sleeves. Like this:
I then pinch them together by the creases so that I don’t lose them, and clip that shit together right there. Then I follow the sleeve down each side until I end up where the lining of the sleeve is actually sewn properly to the sleeve. That’s where you want to stop, because that’s where your stitches should start/end.
By the way, this is a good time to mention that there is often a lot of play inside of the seam allowance for haori sleeves too. I didn’t go over taking that out in this tutorial, because I rarely do it. But you can if you want to! Usually I just pivot out the top and iron a new crease, though, rather than undo the whole damn thing.
Okay! Now we’re clipping the sleeve to the body of the haori. When your haori is whole, the sleeve panel just barely overlaps the body panel, and you will want to sew it back on in the same way. To achieve this easily, I actually clip them together sticking straight up like this:

If you look at that image, my thumb is holding the shoulder of the haori, and the sleeve is actually behind it. The clip is holding the sleeve against it like a sandwich. I place the undersides of their seam allowances together to achieve this. Just like with your side panels, you want to have your thread about a millimeter or two hidden inside of that seam allowance, and you want the sleeve to be stacked on top of the haori body.
Go ahead and prepare another thread with a cloth square. I tend to place the cloth square in the seam allowance on the haori body rather than inside of the sleeve, but in this haori I made an exception because of the damage that the knotting had done to the fabric. Once you have it in place, start sewing! My stitches look like this:

I like to get a few stitches in and then pull tight, bringing the sleeve panel to gently overlap the haori body panel, as seen in the second photo.
Keep doing this until you consider homicide. Or until you reach the other side of the sleeve.
Do that shit again on the other side. DO IT.
YOUR SLEEVES ARE ON. OH GOD, THE END IS IN SIGHT.
Now we’re working with the lining. I tend not to use a bunch of cloth squares for these parts, but you can. I just tie a knot at the end of my thread. Thread up your needle, and we’re going to those spots where the lining meets the edge of the haori fabric, at the arm holes above the side panels. We’re going to tack the lining back to the haori along our new seam allowances. You’re using the same kind of stitch we have this whole time.
Now about this lining. This is where shit gets weird in the best of cases sometimse.
Tie off your thread when you finish tacking your lining to the edge of your arm holes like the pictures, at the bottoms of the sleeves. Do this on both sides.
Now turn your haori completely inside out.
There are two scenarios that you might encounter here. Either your haori had lining for days, or your haori maker was cheap AF, and you don’t, and shit’s getting a little tight in here. Relax, I got this.
If you have lots of lining, you’ll sew your sleeve lining to the haori body lining in kind of the same way you sewed the sleeve to the haori. The sleeve lining should gently overlap. I like to have a long, loose stitch thread that holds the haori body side to the shell of the garment, but it’s not the end of the world if you don’t do that.
If you don’t have lining for days, then here’s another option. Sew your lining to the seam allowance neatly. Like this:

It’s smooth, it’s tidy, and it’s completely reversible later if you decide you hate it. Your other options are to make the haori smaller, or to replace the lining. I think this is a good way to get some mileage out of it, though.
SO.
You’re done. You’ve resized a haori. It’s not really a difficult task, it’s just a bit repetative. I think the hardest part is actually ironing all of the new seam allowances. Here are some things to note as you prepare to alter your haori:
-Sometimes it fucking matters which sleeve is which, make a note or take a picture.
-You cannot do this with shattering fabric. You will annihilate it.
-The hemline of the haori has a bit of cotton or other fabric batting in it to keep it weighted, don’t lose track of that.
-If you’re really careful, you can lose your crease lines completely by getting them wet, but you do run the risk of water spotting if you don’t know how to do that.
-Literally ask me anything.
How big can you expect to make these? Hold up, lemme measure this one.
It’s 44 inches around the chest now. Here’s my sloppy-ass mirror selfie wearing it.

It’s actually quite roomy.
OKAY I’M GOING TO BED NOW.

Love your blog! I was wondering if you have tips how to shorten kurotomesode for about 2 inches? The problem is obviously it has a pattern close to hem, and if I make it shorter from the hem it will make the pattern look a lot less harmonious. I could wear heels, but I don’t like them. I could tie and take extra in my waist but I want to wear kurotomesode open…Please please help!
LikeLike
Oftentimes kimono are hemmed by adding a seam allowance to the body area just under the sleeves.
LikeLike